What better way to start my blog post up again than with a homemade & totally delicious Cheez-it like receipt. The best part about it is that it only takes a few ingredients and very little "elbow grease". After you mow down a

Here is what you will need:
8 oz. shredded cheese
1 cup flour ( I used unbleached all purpose)
4 tablespoons room temperature unsalted butter
3-4 tablespoons ice cold water
1-2 teaspoons salt (optional)
You will also need:
Cookie Sheet
Rolling Pin
Cutting tool
Pastry Mat (optional)
Easy right? I have this receipt memorized already and I only made my first (double) batch yesterday. I have to be honest and say that there is something truly gratifying when you realize you don't have to settle for pre-packaged snacks. Maybe it's just the little bit of effort you have to put in that makes it that more wonderful, but in any case these little bites of goodness will not let you down.
First, shred your cheese. I chose to buy a block of cheese because it seems to be more cost effective, but it is truly up to you what you do. You can also pick whatever flavor cheese you want. Since this was my first time making them I figured I wouldn't get too adventurous and just stay with the basics of cheddar (of the sharp verity).
Once that is done place all the cheese in your mixing bowl along with the butter and begin mixing. Then add the flour. The dough will be clumpy. With the mixer still on add the ice water one tablespoon at a time. Use as much water as you need for the dough to form and to pull away from the bowl without it becoming sticky. Honestly, at this stage I was beginning to question the receipt. It looked more like play dough then the supposed heavenly snack I had been promised. But rest assure its exactly as it should be.
The next step you will remove the dough from the bowl and divide it in half and form 2 disk like rounds. Cover them and place in the fridge for 30 minutes. I waited about 15 minutes and then started to preheat my oven at 375 degrees F. When the 30 minutes is up grab one of the disk and begin to roll out the dough, you should roll it out to be about 1/8 of an inch thick. It is pretty thin but they will puff up once they are baked.
Once you reach that start cutting. I had a fluted pastry cutter and it was perfect for this. However, a sharp knife will do just as well. Cut them in 1 inch squares. You can get real technical and measure to make all of them the same size. However, I just eye balled it. I liked that not all of them were uniform in shape.
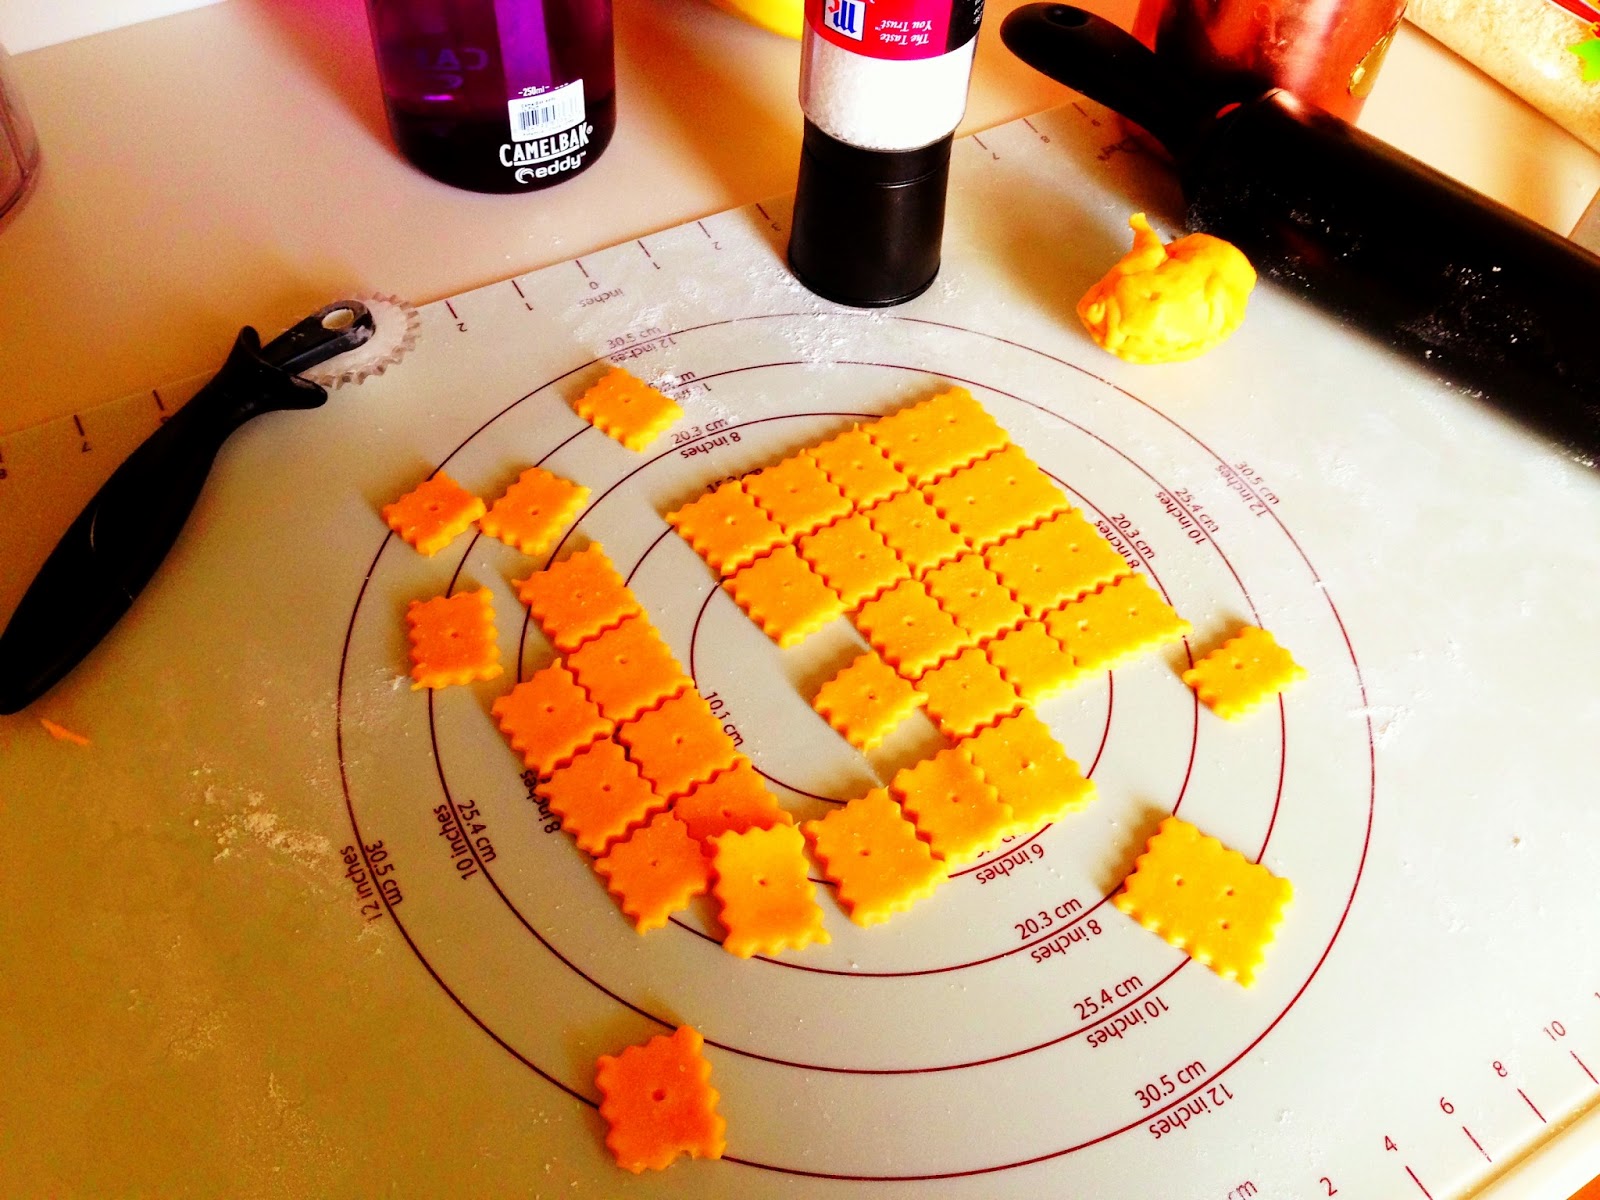
I have stoneware so I chose not to line my baking sheets with parchment paper. However, if you have pans that tend to burn you might want to take this extra step. Start placing the squares on the baking sheet. They don't need much space between each other so you can fit quite a few squares on one sheet. Also, take a tooth pick and poke a hole in the center of the square. I broke mine in half to get a bigger hole. I also would put 2 or 3 holes in the bigger squares. Lastly, you can sprinkle them with salt. Much isn't needed with all the flavor of the cheese.
Bake anywhere from 7-10 minutes. I would check mine and as soon as a light brown started to show on the bottom of the crackers I would pull them out and let them cool. You can line a bowl with paper towels and place them in there. I just grabbed a cooling rack and dumped them on there.

There you go. Pure yummy-ness!
These tasty snacks are wonderful and I look forward to trying many more flavors. My next batch will be herb infused!
